Our Glock parts tray just made the big time! They are on a Johnny Glocks video.
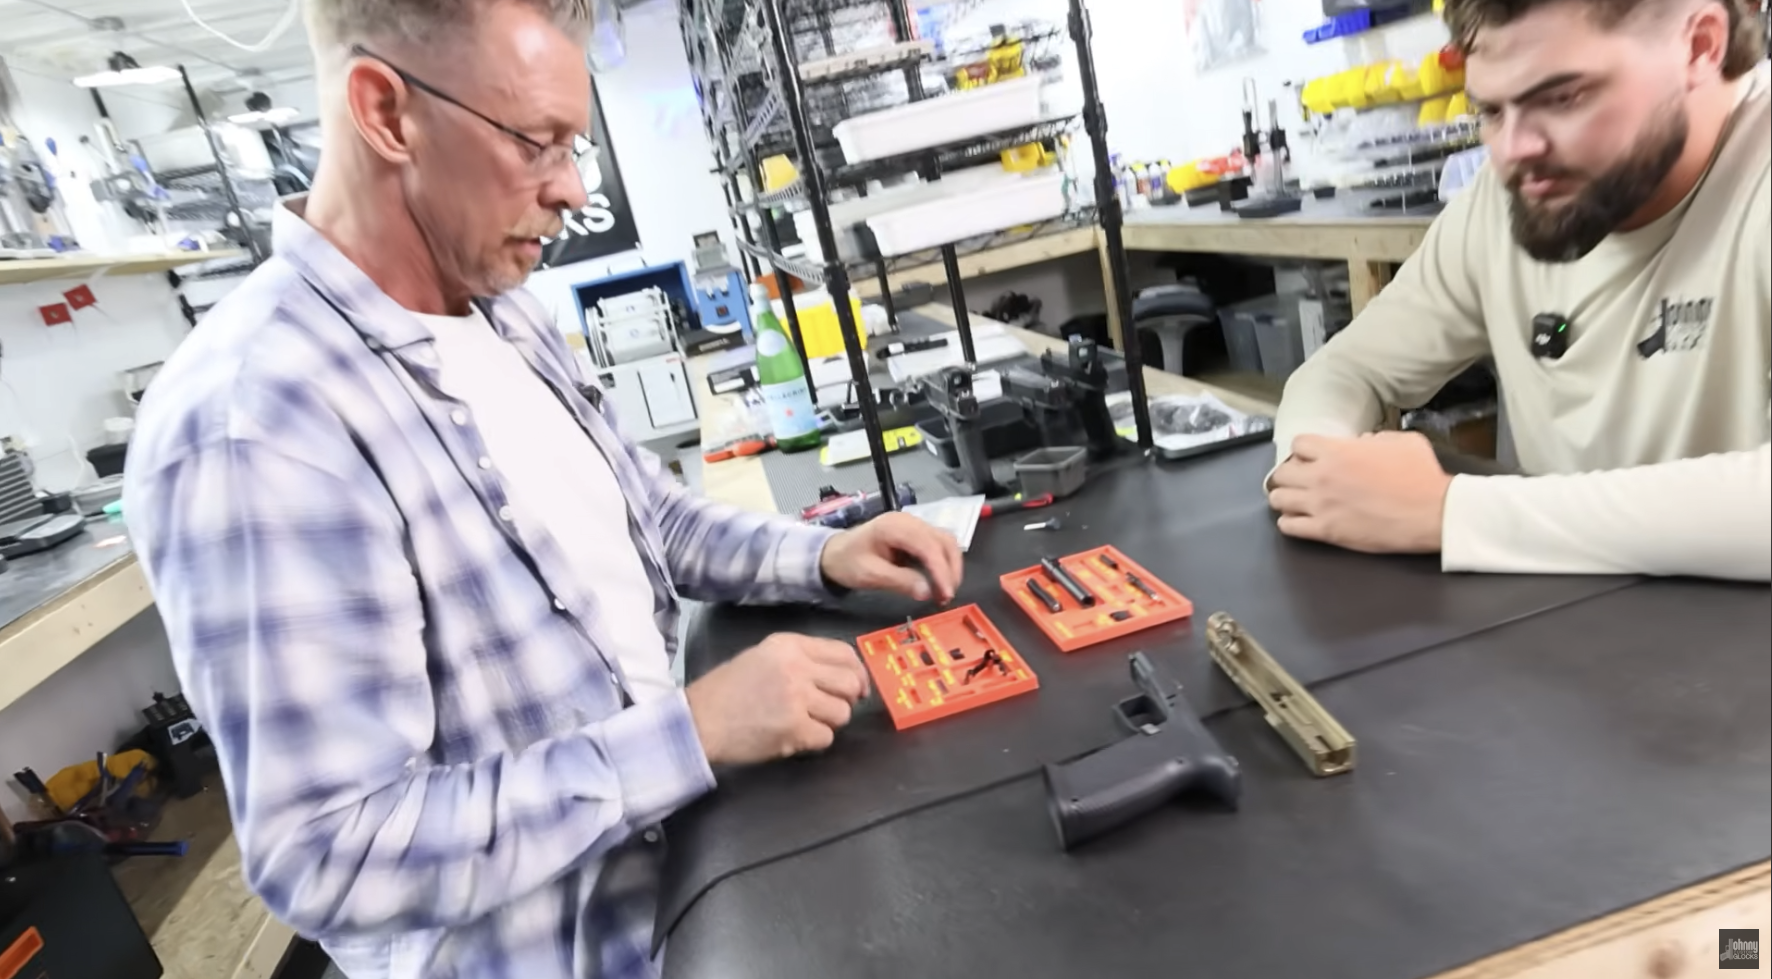
The complete video can be found here, the tray shows up around 1:08:25
Thanks to Johnny Glocks and crew for having us over!
Viking Armory – Veteran Owned and living the Dream

I want to give a shout out to DOODLE REPAIR of Rockton, IL for helping us fix some issues with our old blocks and testing some new ones that will be coming out soon!
All our vise blocks are printed with American Made PCTG with at least 50% infill to give you the strength to do what you need to do. They will hold securely in your vise, including 4 inch vises and lock in just like a magazine will. This allows you to have your hands free to work on the task in front of you. Keeps weapons secure for safe cleaning, assembly and repair.
If you want to customize your blocks let us know and we can use your logo, change color, pretty much anything you want. Some colors might not be available with our American made PCTG, We will work with you to find a quality solution. There might be an additional cost depending on what you want done.
If there is something you don’t see us offering, let us know and we will work with you to to make it.
Right now we offer vise blocks for:
All Glocks including the new Gen 6
1911
AR-15
AR-10 .308
AK-47
AK-74
More on the way!
Get yours here!
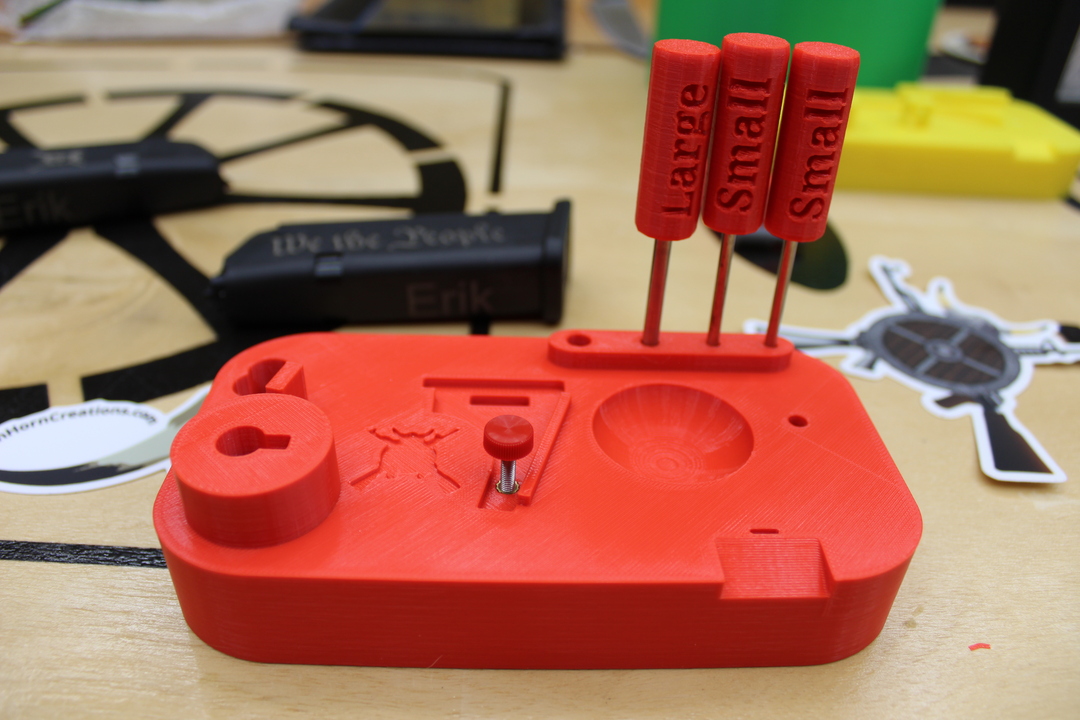
We have added a new Glock pin set, that you can buy HERE, to our collection. We listened to our customers who said that they wanted a longer handle for a better grip. The length of the pins is the same on both versions.
Here you go:


There a 3 pins in 2 different sizes, 1 large and 2 small.

Shown in the below image Gen 4 and prior used 3 pins:

While the Gen 5 and later only use 2:

We want you to be able to use our tools on all you can, so we include 3.
Here is a picture with the pins used on a Glock 17 Gen 4:

Get your Here
Hit us up with comments or requestsAll Documents posted on this site are for informational use only. If you make ANY modifications to your Weapons based on this site, you do at your own risk! If done incorrectly, you can render you weapon unsafe and / or unusable.
More HERE: https://viking-armory.com/?page_id=723
Check it out! An dont laugh, it is my first time on camera 🙂 Leave a comment if you stop by!
We are Veteran family owned small business; Wife and Kids
We do 3D printing of mostly Glock / Modern Sport Rifle items
Some of the items we make are:
Glock Performance trigger tool
Glock Pins
Glock Parts Tray
GlockSmith Block
Vise and Slide Blocks
We also make AR-10, AR-15, AK47 and 74 Vise blocks with more for both coming down the line.
We are going to create a series of videos on on all the items we sell. We hope this will help you to decide to purchase our products as well as answer questions before, during and after purchase.
We stand 100% behind our products. All our Red, Base colored items are printed with PCTG filament sourced right here in the United States of America! We can not make that promise if you want a specific color or filament we cant find.
On that note, we will customize color at no additions cost as long as we have it on hand. It might take us a bit longer to get out depending on the print.
If you want custom logo and/or text get in touch with us BEFORE you order to work out any details.
We went to Shopify because hopefully they don’t drop our products for policy violations. Etsy would just randomly drop items and eBay does not seem to like rifle stuff.
All our reviews are on ebay right now, I will put a link below if you want to check them out. https://feedback.ebay.com/fdbk/feedback_profile/fishhorncreation
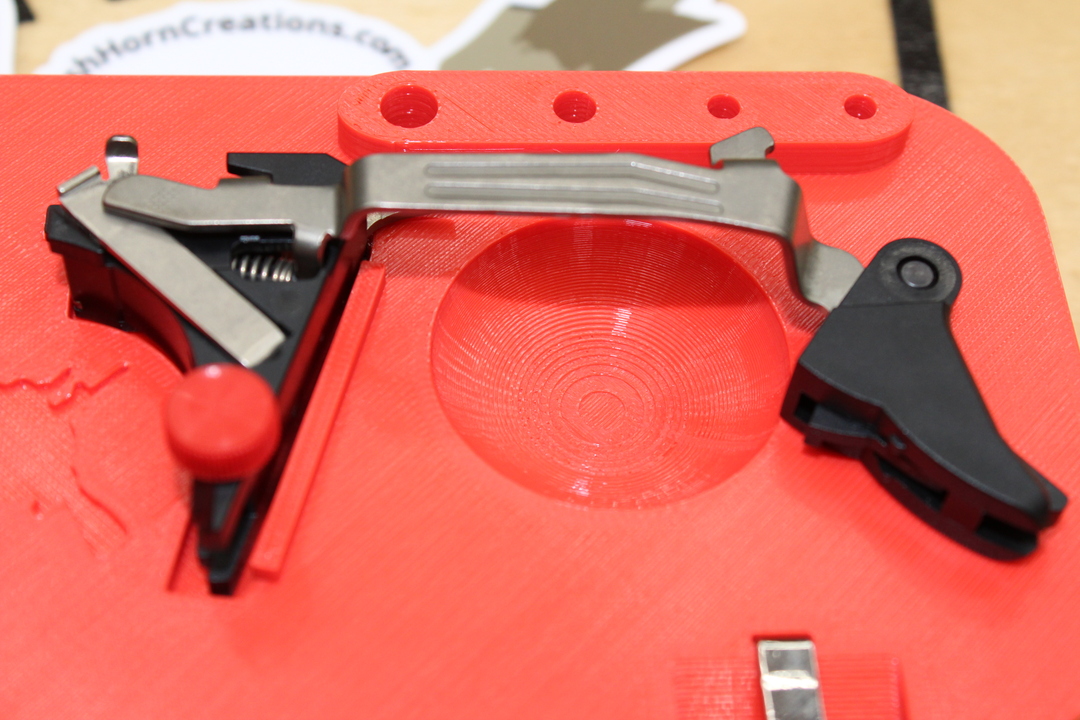
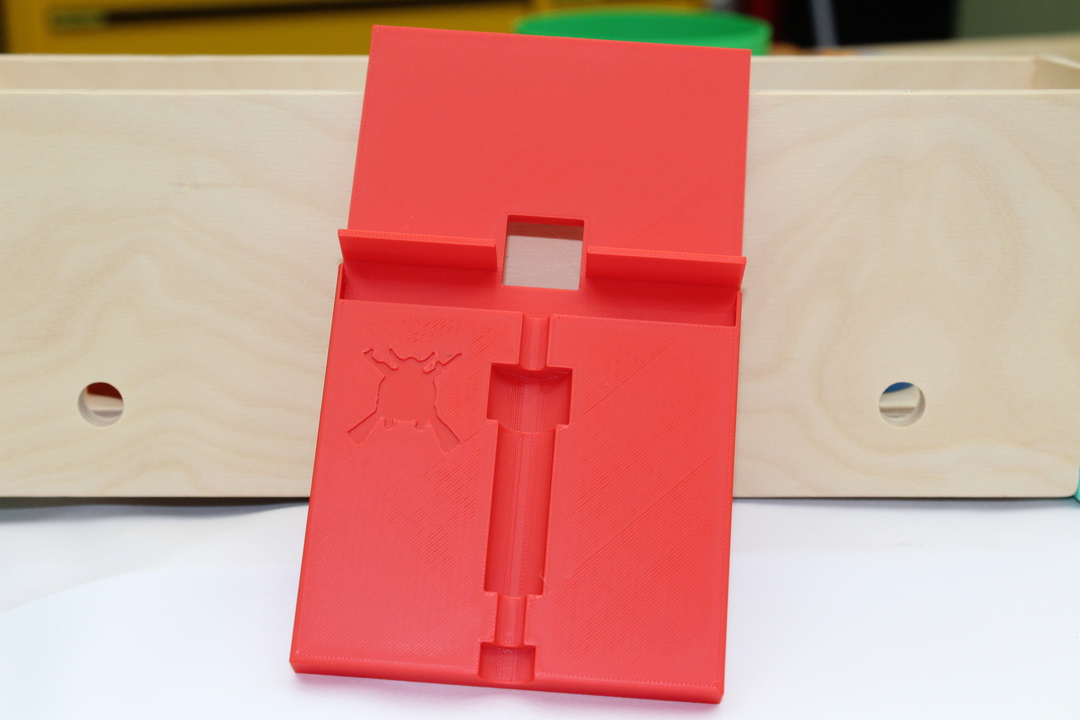
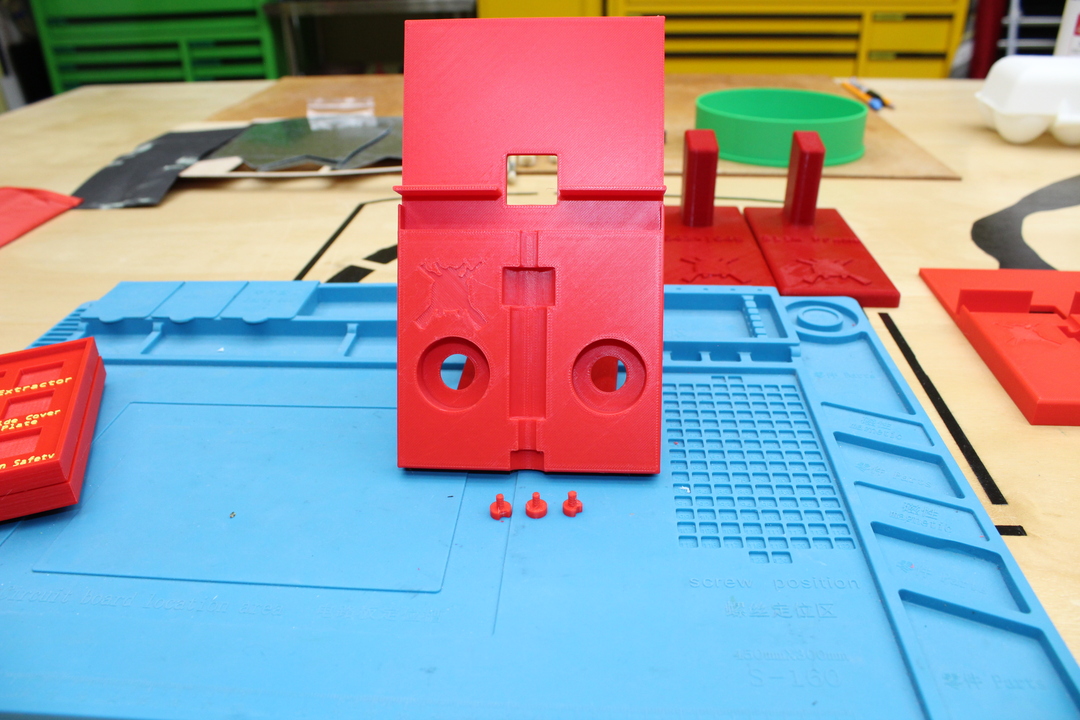
I want to provide an update to the GlockSmith block . With this latest version I changed the way the Glock trigger housing is held down. I removed the printed square “bridge” and replaced it with a brass fitting and a thumb screw. This will allow better installation and usage of the trigger tool portion of the block. Will work with all Glock triggers.
Everything else on the block remains unchanged.
You can get yours HERE
We wanted to create a one stop block for common Glock repairs and modifications .

You can get yours HERE
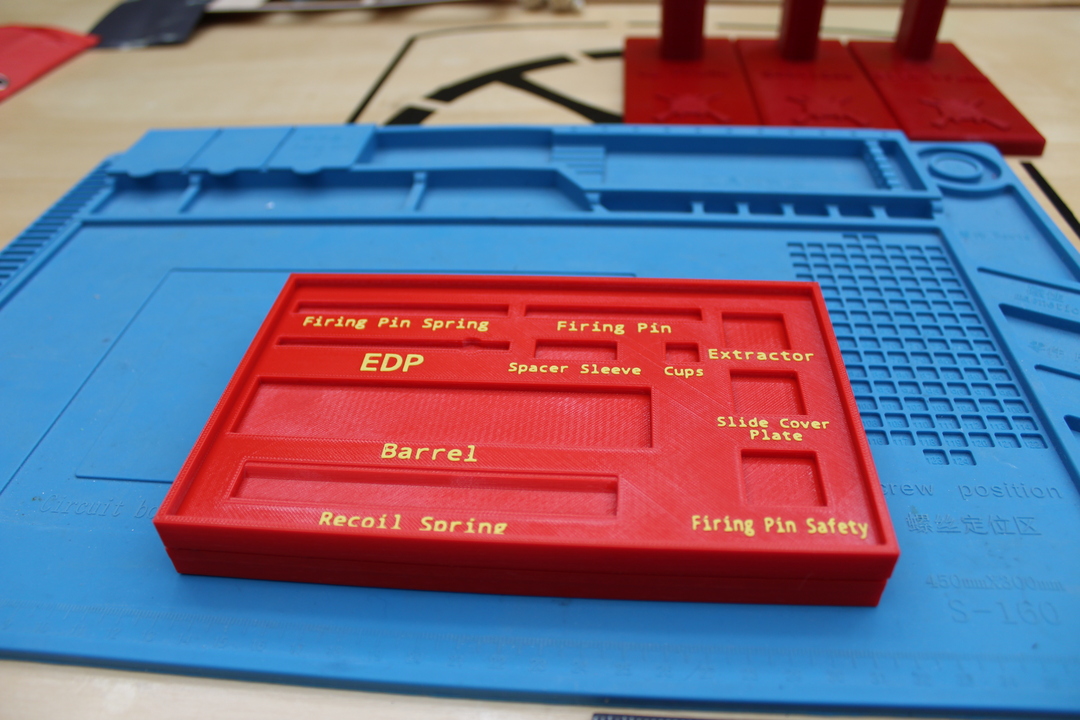
Here is a handy place to inventory and store your Glock parts
These trays are a great place to store and inventory your Glock parts. There are 2 high quality trays, 1 for you Slide (Upper) parts and one for the frame (Lower). Our Glock parts trays work for all Glocks. They stack when empty for convenient storage.
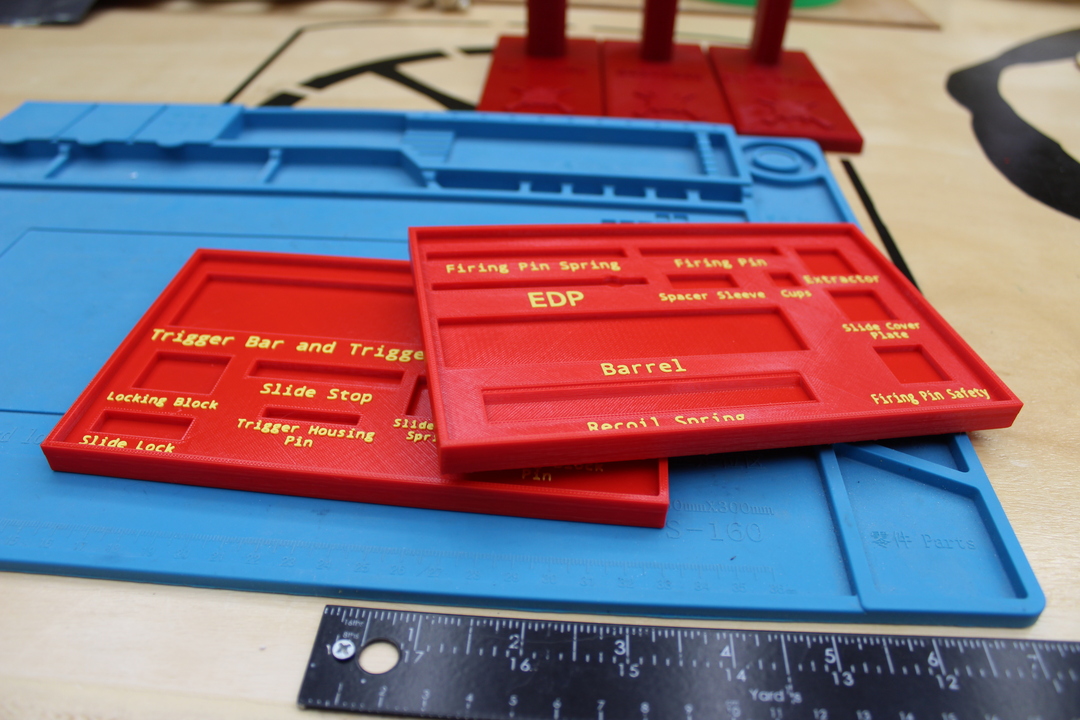
The Glock parts storage trays are great if you are working on multiple Glocks at the same time, lets you keep each Glocks parts together.
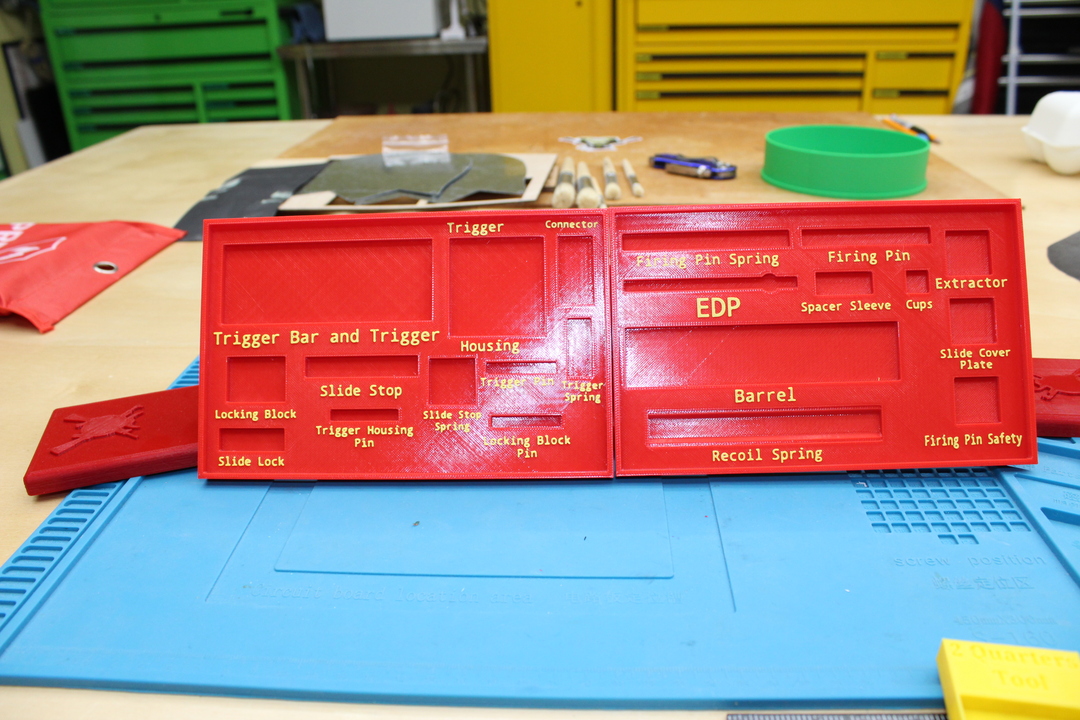
They stack for easy Storage!
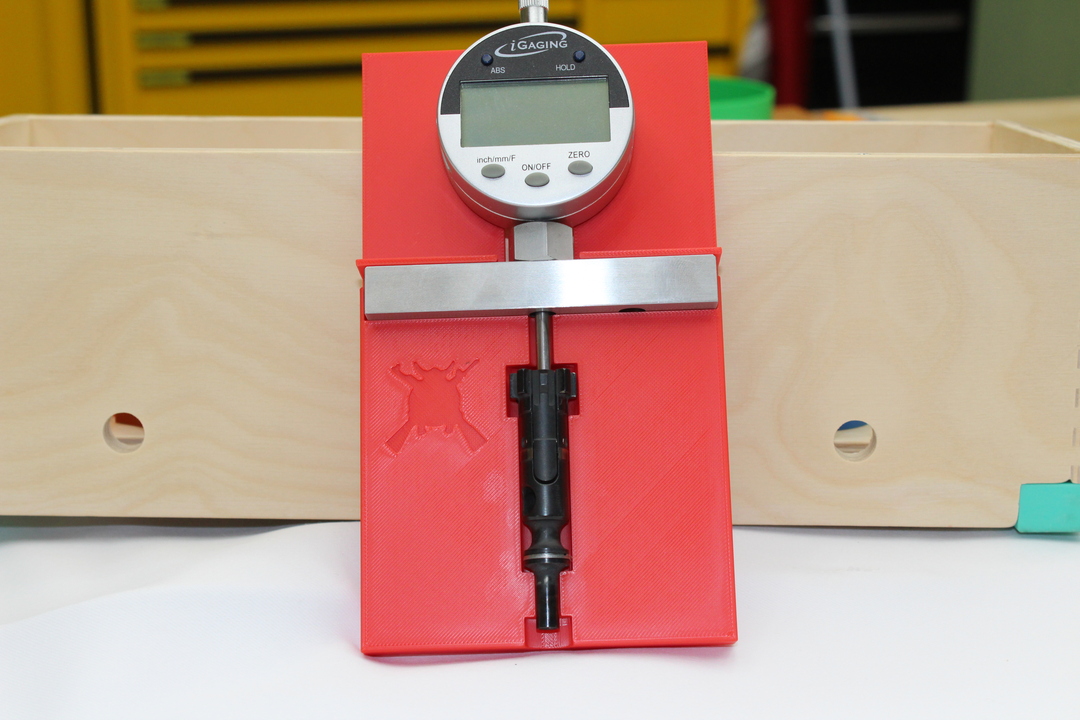
After I made the plugs for the Firing Pin Protrusion Gauge Holder for iGaging Depth Gauge Digital Electronic Indicator, I realized 2 things.
1. I needed to sand down the plug just a bit so it would fit into the hole to get a negative reading.
2. I still had a hard time holding the bolt in a consistent manner. So I came up with the iGauge Firing Pin Protrusion Tool:
Naked:
Dressed:
Then I added spots for boat tail NO-GO and Field Gage:
Naked:
Dressed:

Hit us up with comments or requestsAll Documents posted on this site are for informational use only. If you make ANY modifications to your Weapons based on this site, you do at your own risk! If done incorrectly, you can render you weapon unsafe and / or unusable.
More HERE: https://viking-armory.com/?page_id=723
I have been trying to post several 2A, Weapon, and other items to eBay and Etsy with no luck. They keep taking them down.
If you would like me to print anything from this site, or anything else; go HERE and follow the instructions on my print as a service offering.
eBay – Same as above but eBay
HCR is our eBay Store
Here is a link to our reviews on eBay: https://feedback.ebay.com/fdbk/feedback_profile/hcr
I need to keep this site better updated, as I have many more items to post like:
AK-47 Vise block
jigs and pin holders I have made for my self made SOTAR stuff
and MUCH More
From Glock:
DETAILS
The GLOCK Performance Trigger meets the criteria for those looking for an enhanced trigger pull and ergonomics, all while utilizing a flat-faced trigger and maintaining the same safety features of the GLOCK Safe Action System.
The GLOCK Performance Trigger is now compatible with 9mm Gen4 pistols. A Gen5 slide cover plate now ships with all GLOCK Performance Triggers, as an included replacement for Gen4 models that ensures compatibility and proper function. The GLOCK Performance Trigger will not come installed on any factory models. It is available as an accessory only and must be installed by a certified GLOCK Armorer. GLOCK does not recommend any aftermarket modifications to the GLOCK Performance Trigger.
Trigger Pull Weight: ∼ 5lbs.
Fits: Gen4 and Gen5 models G26, G19, G17, G34 and models G19X, G45, G47

Here is a picture of the housing and connector as it is out of the box.

After a little work this is the polish I got on the trigger bar.

Other side.

Pay special attention to the surface that rubs the connector.

Also extra attention should be applied to the surface touching the safety plunger. Remember, you a polishing, careful not to remove too much material.

The factory Trigger shoe comes apart the same as all Glock trigger shoes.

I modify the safety as I describe HERE

Then put it all back together and install it!
Go Shoot!
I want to provide an update to the GlockSmith block . With this version it has a trigger jig and small parts storage. You can remove and install the trigger pin, remove and install the firing pin cups, adjust your connector.

Also included are top and side working pin storage

I added pin storage on the side. I put them there when I am done.

Modified all the pin holes so the factory pins can be used and wont fall all the way through.


You can use the Glock pins I sell

or the factory pins:

This works for all the pin holes.

You can pick one up On Ebay or Etsy item only has the pin included